
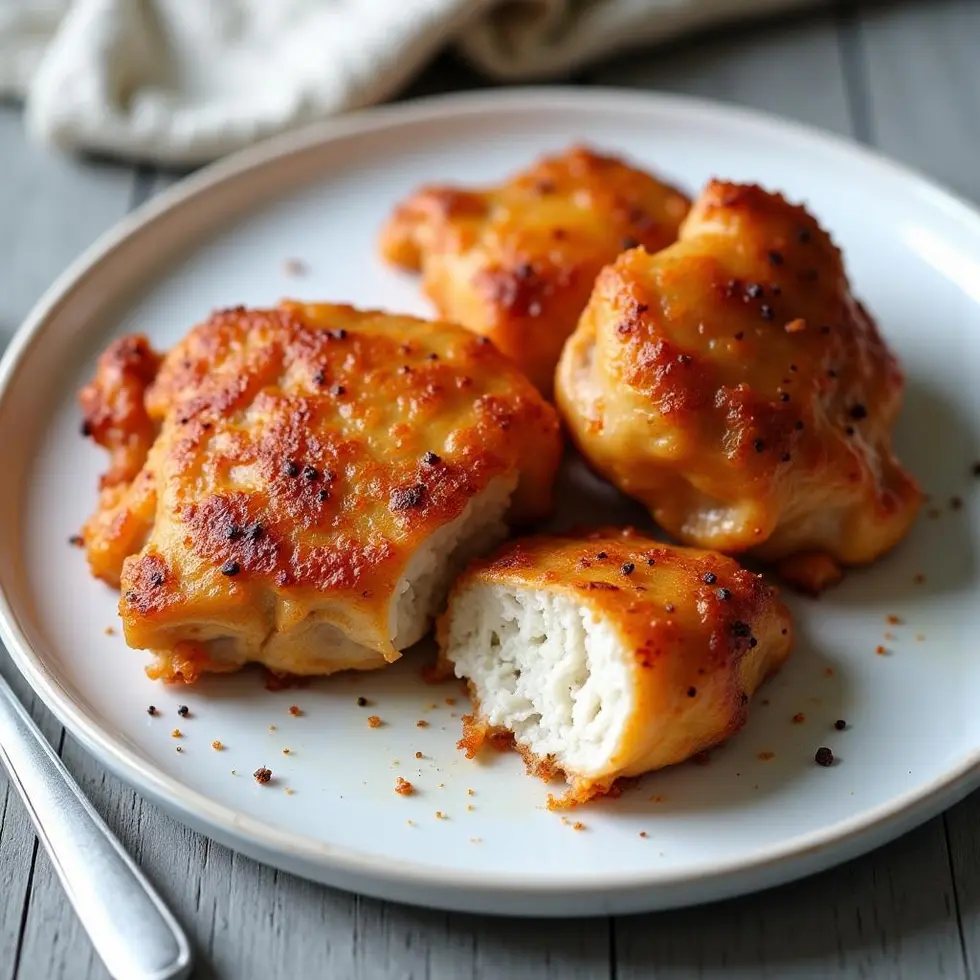
The skin on bone-in thighs turns golden and crisp at 380°F in just eighteen minutes, with none of the oil splatter that happens on the stovetop.
You can batch-cook these air fryer dinner recipes on Sunday, store them in the fridge, and reheat portions throughout the week without losing the crisp you worked to build. Chicken thighs hold up better than breasts during storage because the dark meat stays moist even after a few days, and the skin re-crisps in three minutes when you warm them at 360°F.
The air fryer creates texture through rapid hot air circulation that pulls moisture away from the surface while the interior stays protected by fat and connective tissue. That same principle applies whether you are cooking bone-in chicken, shrimp, or frozen pierogies—spacing the food in a single layer lets the moving air reach every side, which means you get browning without flipping constantly or adding excess oil.
Air Fryer Chicken Dinners
Why Bone-In Thighs Work Better Than Breasts
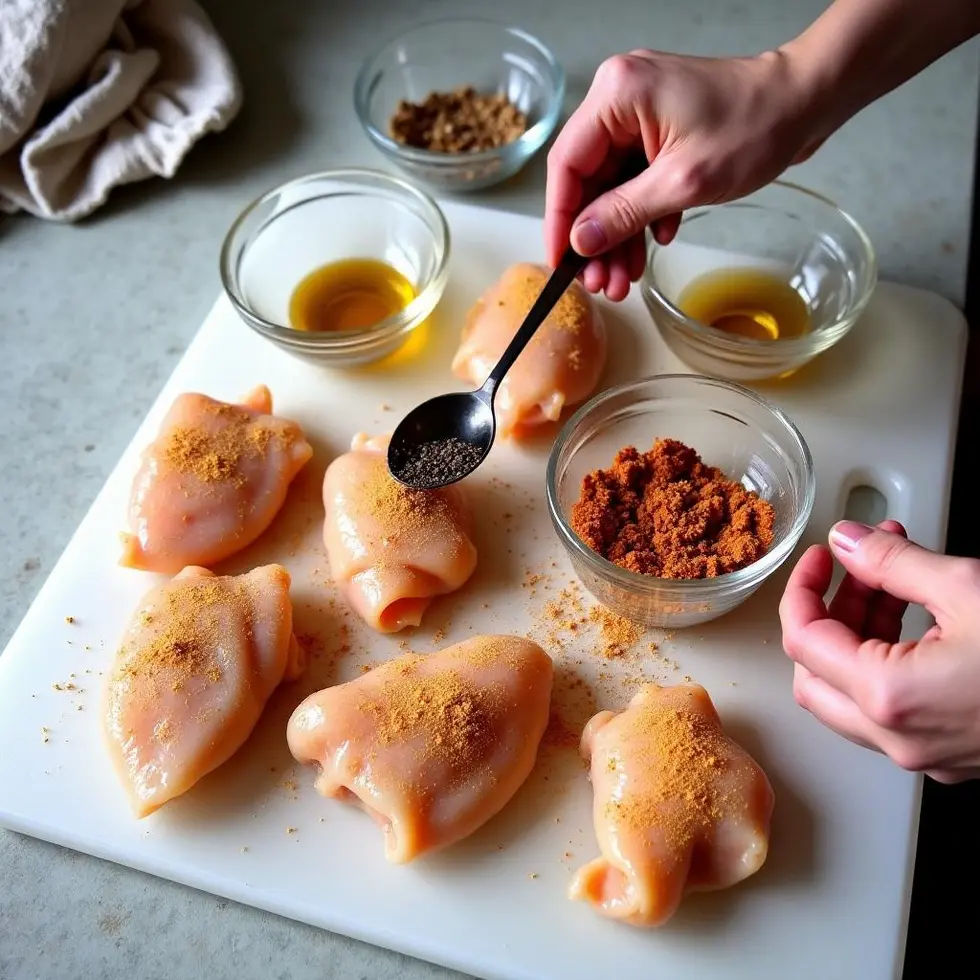
Bone-in, skin-on chicken thighs deliver more flavor and forgiveness than boneless breasts because the bone conducts heat evenly and the fat layer under the skin bastes the meat as it cooks. You season the thighs with garlic powder, smoked paprika, onion powder, black pepper, and salt, then rub a tablespoon of olive oil over every surface to help the spices stick and encourage browning. Pat the chicken dry before seasoning—moisture on the skin steams instead of crisps, which leaves you with rubbery texture instead of the crackle you want.
Place the thighs skin-side down in the basket without overlapping. Air fryers depend on airflow, so crowding the basket traps steam and prevents the Maillard reaction that creates golden color and savory depth. If your air fryer basket is small, cook in two batches rather than stacking the pieces.
Temperature and Timing for Consistent Results
Preheat the air fryer to 380°F / 193°C for three minutes. This step matters because starting with a hot basket sears the skin immediately, which helps the inside stay juicy and begins the browning process before the interior overcooks. Air fry for ten minutes skin-side down, then flip and cook for eight more minutes until the skin is golden and the internal temperature reaches 165°F / 74°C.
Check the temperature with an instant-read thermometer inserted into the thickest part of the thigh without touching the bone. If the skin looks pale after eighteen minutes, add two more minutes—air fryer models vary in fan strength, and some need slightly longer to achieve the same level of browning. Let the chicken rest for three minutes before serving so the juices redistribute instead of running out onto the plate.
Compared to oven roasting, the air fryer cuts the cooking time nearly in half and eliminates the need to preheat a full oven, which makes it practical for weeknight meals when you want tried-and-tested air fryer recipes that fit into a tight schedule. The chicken develops the same crisp skin you get from roasting at 425°F, but the concentrated heat zone of the air fryer basket focuses the browning exactly where you need it.
Fish, Shrimp and Beyond Chicken
Shrimp and White Fish Timing
Shrimp and white fish fillets cook faster than chicken because they contain less connective tissue and almost no fat to insulate the protein. Preheat the air fryer to 375°F / 190°C, then cook large shrimp for six to eight minutes, flipping halfway through, until they turn opaque and firm. White fish fillets—cod, haddock, or tilapia—need eight to ten minutes at the same temperature, and you do not need to flip them if the fillet is thin enough for the circulating air to reach both sides.
Season the seafood lightly with salt, pepper, and a squeeze of lemon, then brush with a small amount of olive oil to prevent sticking. The oil also helps any breadcrumb coating or spice rub adhere to the surface and develop color. If you are working with frozen shrimp, thaw them first and pat them completely dry—frozen seafood releases too much water during cooking, which steams the shrimp instead of crisping the edges.
Vegetarian Mains That Still Feel Satisfying
Tempeh, tofu, and portobello mushrooms all develop texture in the air fryer when you press out excess moisture before seasoning. For tempeh, slice it into half-inch strips, toss with soy sauce and sesame oil, then air fry at 375°F / 190°C for twelve minutes, shaking the basket halfway through. The edges turn crisp and the inside stays tender, which gives you a protein-rich base for grain bowls or salads.
Portobello caps benefit from a light brush of olive oil and a sprinkle of smoked paprika before cooking at 380°F / 193°C for ten minutes. The gills release moisture as they cook, so place the caps gill-side up to let the liquid drip into the basket instead of pooling on the surface. For readers exploring plant-based options, Nummy Recipes offers twenty tempeh ideas that use the air fryer to build texture without frying in oil.
Crispy Sides to Round Out the Meal
Frozen Sides That Skip the Boiling Step
Frozen pierogies, potato wedges, and Brussels sprouts all crisp up in the air fryer without the need for a pot of boiling water or a sheet pan in the oven. For frozen pierogies, brush them with melted butter or olive oil, then cook at 380°F / 193°C for twelve to fourteen minutes, flipping halfway through, until the edges turn golden and the filling is hot.
Frozen vegetables like broccoli florets or green beans need only a light spray of oil and a sprinkle of salt before cooking at 375°F / 190°C for eight to ten minutes. Shake the basket once during cooking to ensure even browning. The air fryer evaporates the ice crystals without leaving the vegetables soggy, which is the main advantage over microwaving.
Fresh Vegetable Sides With Minimal Prep
Fresh asparagus, zucchini rounds, and bell pepper strips cook in six to eight minutes at 380°F / 193°C with just a drizzle of olive oil and a pinch of garlic powder. The high heat caramelizes the natural sugars in the vegetables, which adds sweetness and depth that steaming or boiling cannot achieve.
For potatoes, slice them into half-inch wedges, toss with olive oil and smoked paprika, then cook at 400°F / 204°C for fifteen to eighteen minutes, shaking the basket every six minutes. The outside turns crisp while the inside stays fluffy, and the frequent shaking prevents the wedges from sticking to the basket. Beginners often skip the shake step, which leaves one side pale and the other side dark—setting a timer for the midpoint reminder keeps the browning even.
If you batch-cook sides on Sunday, store them in airtight containers and reheat at 360°F for three to four minutes to restore the crisp before serving. Readers looking for kid-friendly options can apply the same timing to frozen chicken nuggets, which follow a similar crisp-then-check approach.
Making the Week Easier With Smart Batching
Cook two batches of chicken thighs on Sunday, let them cool completely, then refrigerate them in a single layer separated by parchment paper. When you reheat a thigh on Wednesday, the skin re-crisps in three minutes at 360°F / 182°C, and the meat stays moist because the bone and fat protect it during storage. This approach works for most air fryer dinner recipes—shrimp holds for two days, vegetable sides hold for three, and bone-in chicken holds for four.
Label each container with the reheat temperature and time so you do not have to guess on a busy evening. The air fryer preheats faster than an oven and does not heat up the kitchen, which makes it practical for reheating single portions without wasting energy or time.
Frequently Asked Questions
Can I cook frozen chicken thighs in the air fryer?
You can, but the skin will not crisp as well because the frozen moisture steams the surface before the temperature climbs high enough to brown it. Thaw the chicken in the fridge overnight, pat it dry, then season and cook as directed for the best texture.
Do I need to preheat the air fryer every time?
Preheating for three minutes at the target temperature helps the skin sear immediately, which helps the inside stay juicy and starts the browning process. Skipping this step adds two to three minutes to the total cook time and often results in uneven color.
Why is my chicken skin rubbery instead of crispy?
Moisture on the surface steams the skin instead of crisping it. Pat the chicken completely dry with paper towels before rubbing with oil and seasoning, and make sure the pieces are not touching in the basket so air can circulate around each one.
Can I use boneless, skinless thighs instead?
Boneless, skinless thighs cook faster—about twelve to fourteen minutes at 380°F / 193°C—but they do not develop the same crisp exterior. Brush them with a light coating of oil and check the internal temperature at twelve minutes to avoid drying them out.
How do I know when the chicken is done without cutting into it?
Use an instant-read thermometer inserted into the thickest part of the thigh without touching the bone. The chicken is safe to eat when it reaches 165°F / 74°C, and the juices should run clear rather than pink.
Air Fryer Chicken Thighs
Ingredients
Method
- Preheat the air fryer to 380°F / 193°C for 3 minutes.
- Pat the chicken thighs dry, then rub with olive oil and season all over with garlic powder, smoked paprika, onion powder, black pepper, and salt.
- Place the chicken thighs skin-side down in the air fryer basket in a single layer without overlapping.
- Air fry for 10 minutes, then flip skin-side up and cook for 8 more minutes until the skin is golden and crispy and the internal temperature reaches 165°F / 74°C.
- Rest for 3 minutes before serving to let the juices redistribute.
